Monday, June 28, 2010

Demolisher WIP...

When I started this army, one of the things I wanted to do was make use of this old relic....

Photobucket

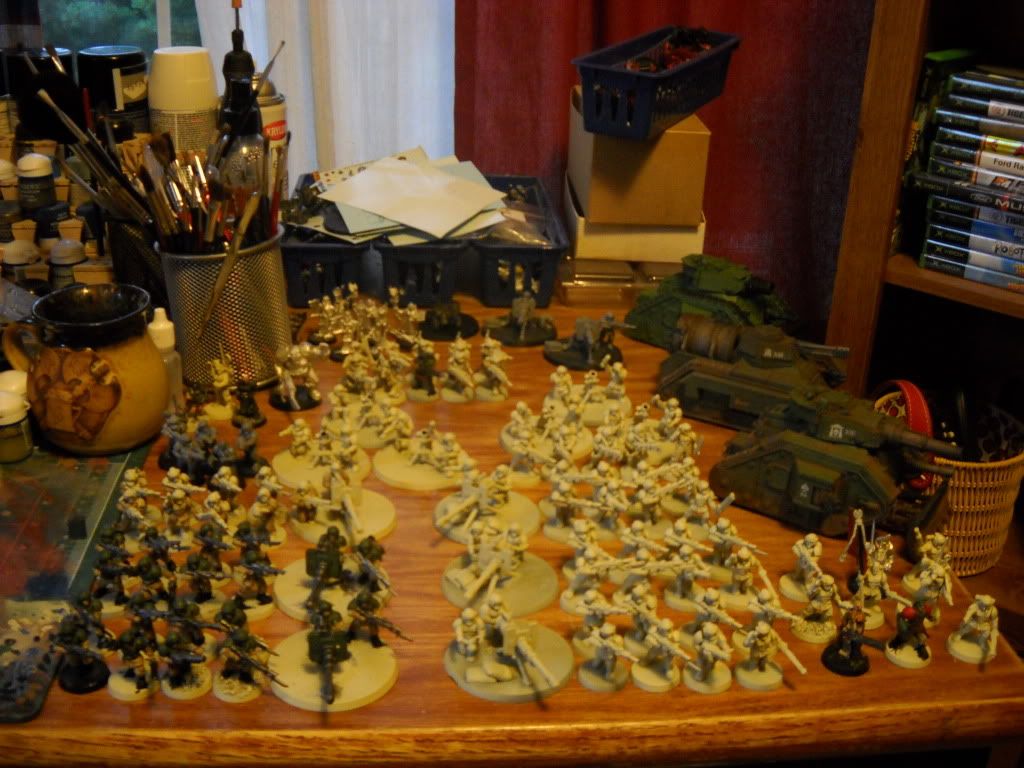
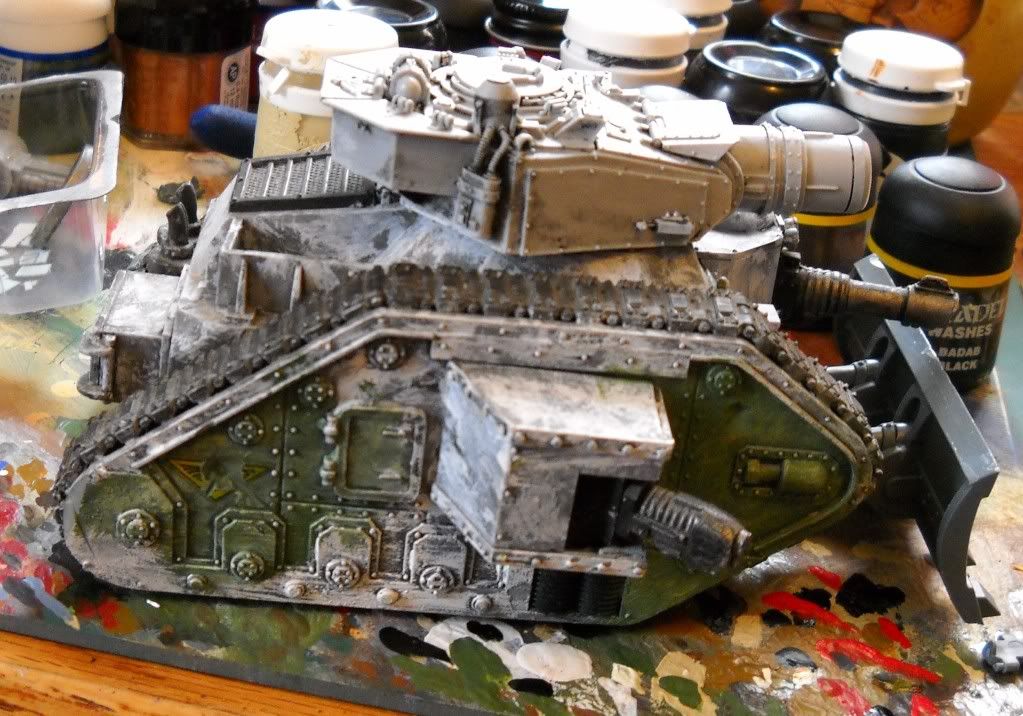
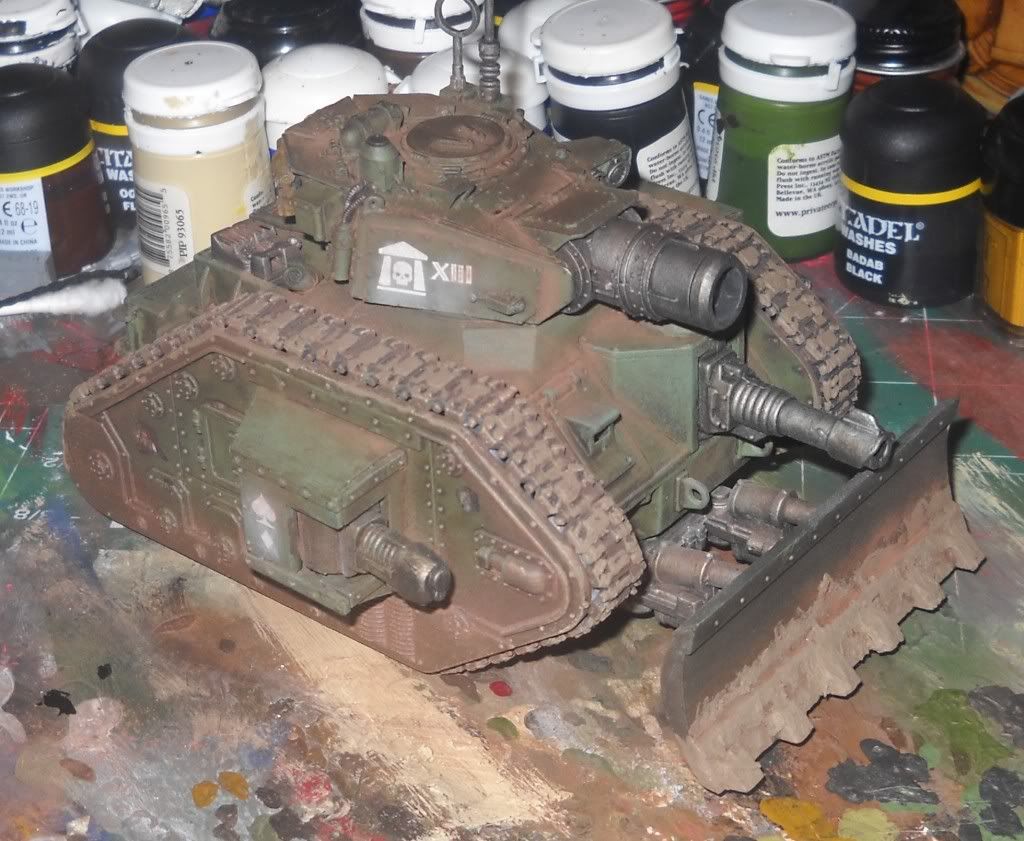
This Russ hull is all thats left of my first 40k army, a Guard army I started when 3rd edition first came out. It's been sitting at the bottom of a bitz box for most of a decade now collecting dust.

The orginal turret is long lost, so I went on ebay and found a lightly used forgeworld demolisher turret to replace it. After digging thru the bitz box I also found the orginal sponsons with plasma cannons.

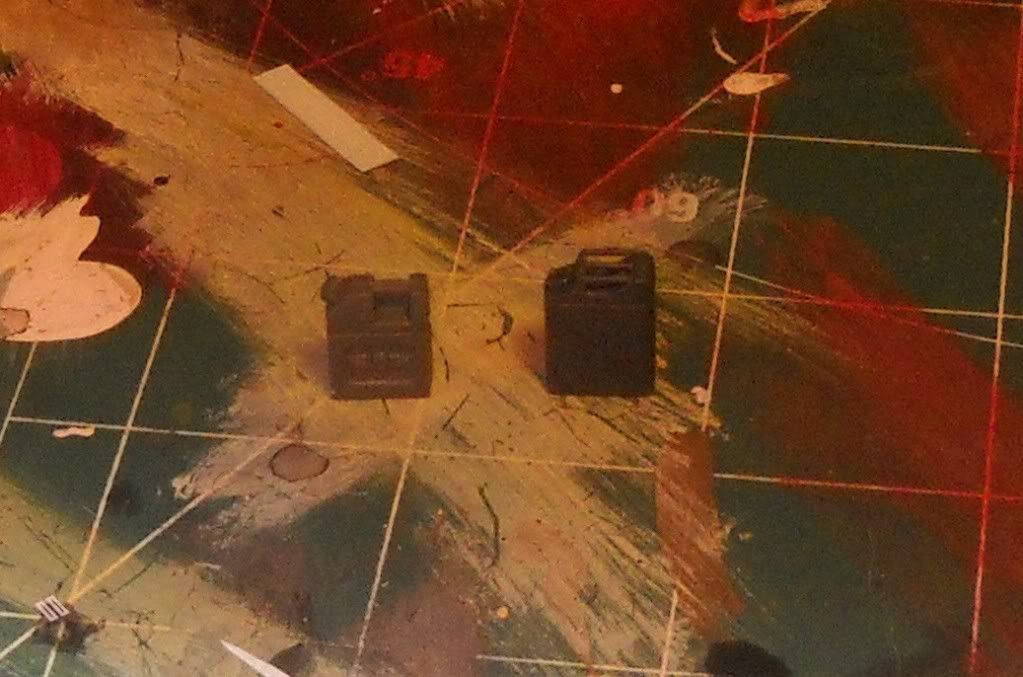
Raided the bitz a lil more for the plow and other tidbits.....grabbed some tamiya 1/35 scale packs and jerry cans, as well as the cadian resin packs....a lil paint....


Photobucket

Photobucket

Photobucket

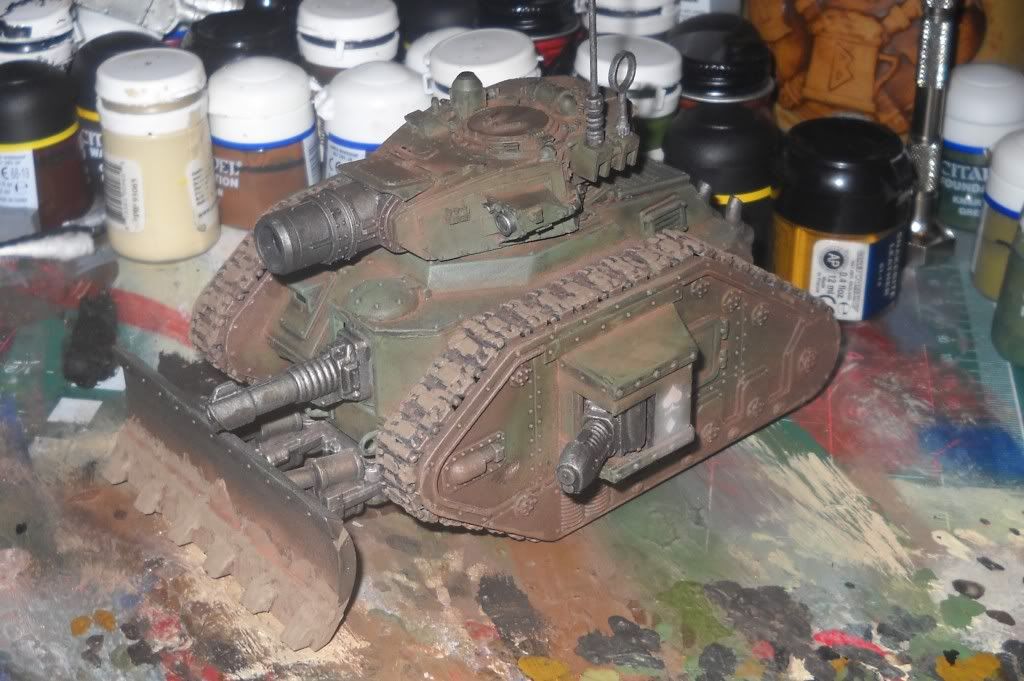
Still tinkering with it a lil....but I like the progress so far. After looking at the photos, think I'm gonna go back with the pastels and and drybrushing to work on the shading in a few places.

The white around the transfers isn't glare, it's a lil white pastel powder used to, I hope, give the effect of washed out paint. Not sure I like it yet, will have to see.

The mud on the plow and tracks is from a tamiya mud pin..(wonderful lil thing)...and in person it gives the effect of looking like real mud.

See ya later this week.

Saturday, June 26, 2010

Say yer prayers...

Photobucket

Been bouncing around hobby-wise doing different models this week. Was able to get the a good chunck done on my company priest for the guard tho...hair is a lil yellow, but with the rest of the army being sorta drab, so I don't mind a lil color here and there.

Here is a group shot of the army as it stands now...


Photobucket

Most everything is atleast primed...gonna work on inking the cloth for that second platoon this week.

The demolisher in the back is accually almost done. Hopefully will have pics of it tommorrow or early next week.

Wednesday, June 23, 2010

Officer done(ish)

Finished painting the Capt. for my army this weekend...

Photobucket

Photo quality isn't the best, gonna have to work on my camera skillz...

I did the shoulder pads red instead of green to match the chest piece after noticing the cadian officer on the front cover of the guard codex wore red shoulder pads. While not the smartest thing to do in real life....("just shoot the idiots with the red on"..)...it does add a really nice splash of color to the army.

Tuesday, June 22, 2010

Needs more Jerry Can!

So I was looking at the back end of the leman russ you see in the first post thinking "what can I stick in that stowage area?"...hate how open and bleh it looks. Was poking around the local hobbytown looking for something that would work, and came across these....

Photobucket

You get 18 cans for around $15. Scale is a lil off for GW minis, but too bad...

Photobucket

Left can comes from the gw vehicle spru, right one from the jerry can kit. There is writing on the can side, but that should be easily hidden with a lil green stuff and proper placement. They fit nicely in the stowage area and should add some nice detail to the tanks.

Saturday, June 19, 2010

I h8 saturdays...

Work sucks sometimes...really, really sucks. No painting to be had this evening, so I thought I'd live a lil vicariously thru a quick blog post.....here is a recently painted hellhound....


Photobucket

Still got a lil shading/inking to do on the barrel...and I wanna try some black pastel dust applied to the engine exhaust...will post pics when I get back around to working on this a lil....

Friday, June 18, 2010

Of pink unicorns.....

So, here we go....first post! Let me start by saying I have no clue what I'm doing. I've been painting on this guard army of mine for about 6 months (give or take) and thought it would be cool to document it a lil, outside of that this blog will probley wonder about aimlessly covering a wide range of topics....you've been warned...

But I digress, onto the topic at hand. Imperial Guard. This army is one I've been wanting to do for a long, long time. I've bought bits and pieces here and there for the last 3-4 years, stockpiling infantry and vehicles, even had fluff and regimental names already worked out...but never seeming to find the time to get the project rolling till recently. At one point a good friend of mine referred too this "project" of mine as "The Pink Unicorn" because he thought there was a better chance of seeing a pink unicorn than this army of guard I kept saying i had...

Progress these last few months has been good, with a large chunk of the army being primed and ready for paint. Here is a tank I've been working on...

Photobucket

This is a pretty simple paint scheme. Knarloc Green over a black base coat, devlin mud washed over the model, then a light drybrush of knarloc, followed by a very light drybrush of the menoth base white (i think that's the name) from the p3 paint line. Decals are applied at this point.

From there, dark brown paint of varying shades is worked around the track areas in a mud spray pattern as one would expect to see on an actual vehicle. Next, Pig Iron Metal (p3 version of bolt gun metal...very nice metal color imho) is applied to the guns barrels and plow, as well as certain areas of the tank where appropriate. A matt varnish is applied once everything is dried.

Finally, the weathering stage. Once the varnish is completely dry, brown colored pastels were shaved to a fine powder and worked in the the crack, crevices with an old paint brush and smeared around to give the effect of a very dusty tank. If you've seen the forgeworld weathering powders, this is a very similar process with good results without the high cost...($8 pastels vs $35 dollar forgeworld powders)...

Hope the 3-4 people who will see this post enjoy it...feel free too comment.